Building Flows
Flows are automated data pipelines that run based on triggers. This guide walks you through creating a flow from start to finish, including configuration, testing, and deployment.
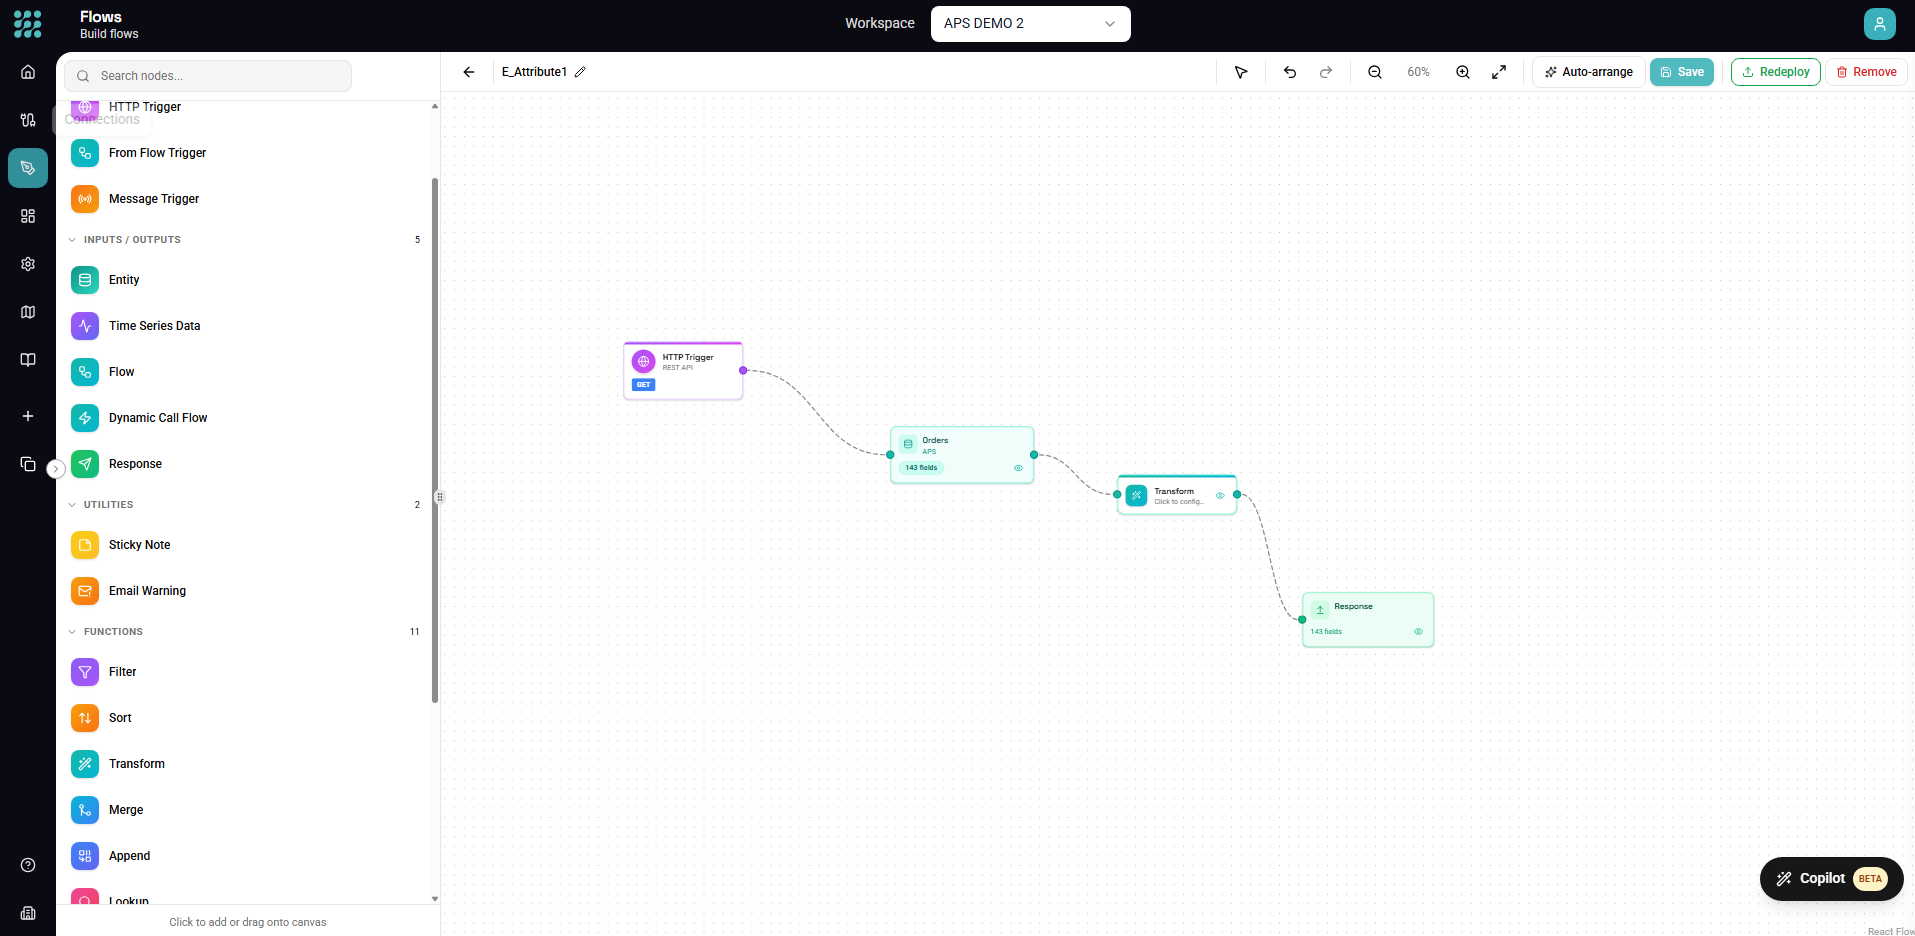
Flow Anatomy
Every flow has these components:
[Trigger] → [Data Sources] → [Transformations] → [Actions]
- Trigger - What starts the flow (schedule, HTTP, manual)
- Data Sources - Where data comes from (entities, views, other flows)
- Transformations - How data is processed (filter, transform, merge)
- Actions - What happens with results (write, API call, response)
Creating a New Flow
Step 1: Open the Designer
- Click Flows in the sidebar
- Click + New in the toolbar
- Select Flow
A new canvas opens with an empty flow.
Step 2: Add a Trigger
Every flow needs at least one trigger. Click Action in the toolbar or drag from the Element Panel:
Schedule Trigger
- Runs on a time schedule (cron)
- Good for: Regular syncs, batch processing, reports
HTTP Trigger
- Creates a REST API endpoint
- Good for: Real-time requests, webhooks, integrations
Manual Trigger
- Runs on-demand
- Good for: Testing, ad-hoc processing, migrations
From Flow Trigger
- Called by other flows
- Good for: Reusable logic, modular design
Step 3: Add Data Sources
Add entities to pull data into your flow:
- Click Entity in the toolbar (or drag from panel)
- Select your connection
- Choose the table/endpoint
- Click Add
Tip: Select multiple entities at once by holding Cmd/Ctrl while clicking.
Step 4: Connect Nodes
Draw connections to establish data flow:
- Click the output handle (right side) of a node
- Drag to the input handle (left side) of the next node
- Release to create the connection
Data flows left to right through your connections.
Step 5: Add Transformations
Process your data with transform nodes:
Filter - Keep only rows matching conditions
Status = "Active" AND Amount > 100
Transform - Add calculated fields
FullName = FirstName & " " & LastName
Merge - Join data from multiple sources
Orders JOIN Customers ON Orders.CustomerID = Customers.ID
Group By - Aggregate data
GROUP BY Region: SUM(Sales), COUNT(Orders)
Step 6: Add Actions
Define what happens with the processed data:
Write Data - Save to database or file
Call API - Send data to external service
Response - Return data (for HTTP triggers)
Notification - Send alerts
Step 7: Configure Each Node
Click each node to open its configuration panel:
- Select the node
- Panel opens on the right
- Configure required settings
- Settings auto-save
Step 8: Test with Preview
Before deploying, test your flow:
- Select a node in your flow
- Click Preview (or Cmd/Ctrl + Enter)
- View the data at that point
- Check for expected results
Preview each node to verify data flows correctly through your pipeline.
Step 9: Save
Your flow auto-saves, but you can manually save:
- Click Save (or Cmd/Ctrl + S)
- Enter a name if prompted
- Choose a category (optional)
Use descriptive names: "Daily Customer Sync" not "Flow1"
Step 10: Deploy
When ready for production:
- Click Deploy in the toolbar
- Confirm deployment
- Flow is now active
For scheduled flows, executions begin at the next scheduled time. For HTTP triggers, the endpoint becomes available.
Example: Daily Sales Sync
Let's build a flow that syncs daily sales data:
1. Trigger
- Add Schedule Trigger
- Set: Daily at 6:00 AM
2. Data Sources
- Add "Sales" entity from your database
- Add "Products" entity
3. Filter
- Add Filter node after Sales
- Condition:
OrderDate = TODAY() - 1(yesterday's orders)
4. Merge
- Connect Sales and Products
- Join on: Sales.ProductID = Products.ID
- Type: Left Join
5. Transform
- Add calculated field:
TotalAmount = Price * Quantity - Add:
Region = COALESCE(CustomerRegion, "Unknown")
6. Group By
- Group by: Region, ProductCategory
- Aggregate: SUM(TotalAmount), COUNT(OrderID)
7. Write Data
- Destination: "DailySalesSummary" table
- Mode: Insert
- Map fields appropriately
8. Test
- Preview at each node
- Verify data looks correct
- Check aggregations
9. Deploy
- Click Deploy
- Flow runs daily at 6 AM
Flow Patterns
ETL Pattern
Extract, Transform, Load:
[Entity] → [Filter] → [Transform] → [Write Data]
Fan-Out Pattern
One source, multiple destinations:
             → [Filter A] → [Write A]
[Entity]
             → [Filter B] → [Write B]
Fan-In Pattern
Multiple sources, one destination:
[Entity A] →
             [Merge] → [Transform] → [Write]
[Entity B] →
Lookup Pattern
Enrich data from reference tables:
[Main Data] → [Lookup: Reference Table] → [Transform]
Error Handling Pattern
Separate success and failure paths:
               → [Success Path] → [Write Success]
[Process]
               → [Error Path] → [Log Errors]
Testing Strategies
Unit Testing
Test each node individually:
- Preview with known input
- Verify output matches expectations
End-to-End Testing
Test the complete flow:
- Use Manual trigger first
- Run with test data
- Verify final output
Edge Case Testing
Test unusual scenarios:
- Empty data sets
- Null values
- Large volumes
- Invalid data
Deployment Checklist
Before deploying to production:
- All nodes configured (no red indicators)
- Connections are healthy
- Preview shows expected results
- Error handling in place
- Appropriate trigger schedule
- Descriptive name assigned
- Tested with realistic data
Monitoring After Deployment
Once deployed:
- Check Dashboard - Verify executions appear
- Review Insights - Monitor success/failure
- Set Alerts - Get notified of failures
- Track Performance - Watch execution times
Updating Deployed Flows
To modify a deployed flow:
- Open the flow in Designer
- Make your changes
- Test with Preview
- Save changes
- Changes apply to next execution
No need to redeploy for most changes. Only undeploy if you need to stop executions.
Best Practices
Design
- Keep flows focused (single responsibility)
- Use views for reusable transformations
- Document with good names and groups
Testing
- Always preview before deploying
- Test with realistic data volumes
- Verify edge cases
Monitoring
- Check executions regularly
- Set up failure notifications
- Review performance trends
Maintenance
- Update when source schemas change
- Review and optimize slow flows
- Archive unused flows
Troubleshooting
"Invalid configuration"
- Check all required fields are filled
- Verify connections are healthy
- Look for red indicators on nodes
"No data returned"
- Check source has data
- Verify filter conditions
- Confirm date ranges
"Timeout during execution"
- Optimize slow queries
- Add row limits
- Process in batches
Next Steps
- Triggers - Configure trigger types
- Transforms - Master transformations
- Actions - Output options
- Dashboard - Monitor executions