Workflow List
The Workflow List is your central hub for managing all workflows in your workspace. From here you can create, organize, deploy, and monitor all your data pipelines.
Accessing the Workflow List
Click Flows in the left sidebar. If you're not editing a specific workflow, you'll see the Workflow List.
Understanding the List View
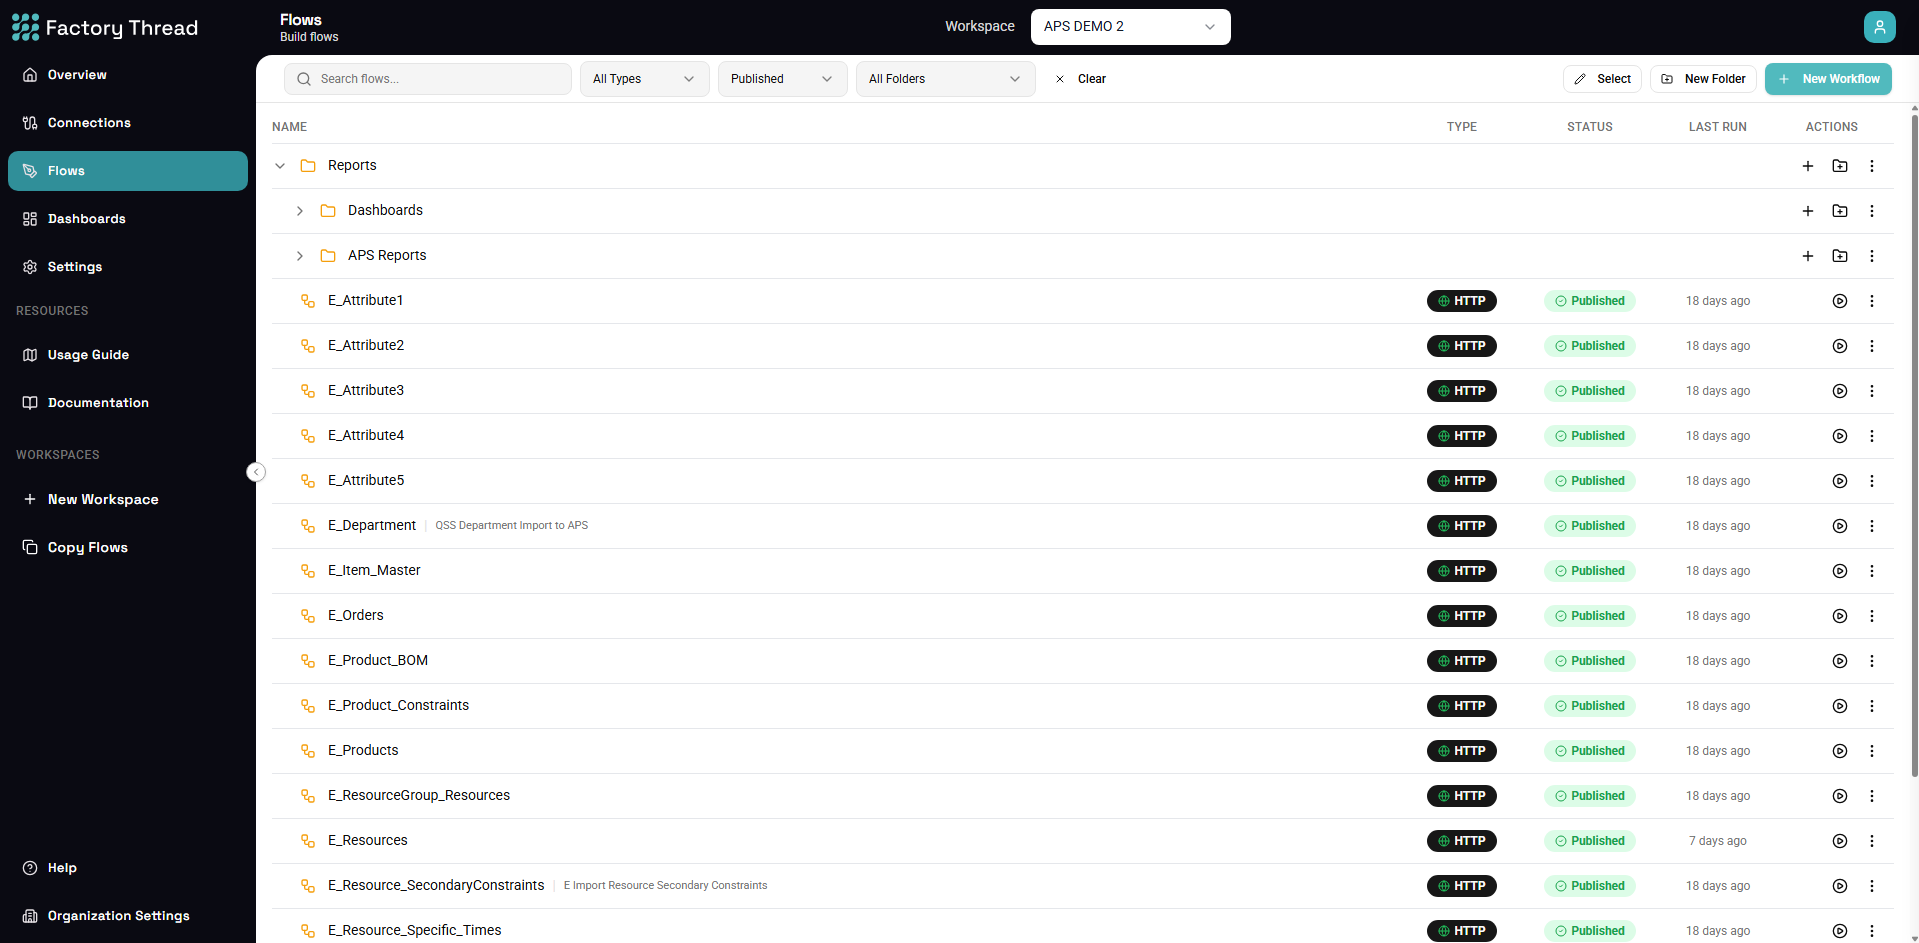
Workflow Table
The table displays all workflows with key information:
| Column | Description |
|---|---|
| Name | Workflow name (click to open in editor) |
| Type | Trigger type icon (Schedule, HTTP, Callable) |
| Category | Folder organization |
| Status | Deployment state (Draft or Published) |
Trigger Type Icons
Workflows are identified by their trigger type:
- Clock icon - Schedule trigger (runs on a cron schedule)
- Globe icon - HTTP trigger (responds to API requests)
- Workflow icon - Callable trigger (invoked by other workflows)
Deployment Status
- Draft - Workflow is saved but not active. Can be edited freely.
- Published - Workflow is deployed and running. Executes according to its trigger.
Finding Workflows
Search
Use the search bar to find workflows by name. The search is case-insensitive and matches partial names.
Filter by Type
Filter the list to show only specific trigger types:
- Click a trigger type button to show only those workflows
- Click again to remove the filter
- Multiple filters can be active simultaneously
Filter by Status
Show only draft or published workflows:
- All - Show all workflows regardless of status
- Draft - Show only unpublished workflows
- Published - Show only active workflows
Filter by Category
Use the category dropdown to filter by folder. Categories help organize workflows into logical groups.
Managing Workflows
Creating a New Workflow
- Click the New Workflow button
- Select the trigger type
- Enter a name and optional category
- Click Create
You'll be taken directly to the editor to build your workflow.
Opening a Workflow
Click any workflow name to open it in the editor. The list view will be replaced by the canvas editor.
Bulk Operations
Select multiple workflows using checkboxes to perform bulk actions:
- Deploy - Publish selected draft workflows
- Undeploy - Remove selected published workflows from active state
- Delete - Permanently remove selected workflows
Quick Actions
Hover over a workflow row to reveal quick action buttons:
- Edit - Open in the designer canvas
- Deploy/Undeploy - Toggle deployment status
- Duplicate - Create a copy of the workflow
- Delete - Remove the workflow
Deployment Workflow
Publishing a Workflow
- Ensure your workflow is complete and tested
- From the list, click the workflow's deploy button, OR
- Open the workflow and click Deploy in the toolbar
Published workflows become active immediately according to their trigger:
- Schedule triggers start running on their configured cron
- HTTP triggers become accessible at their endpoint URL
- Callable triggers can be invoked by other workflows
Undeploying a Workflow
To stop a workflow from executing:
- Click the undeploy button on the workflow row
- Confirm the action
The workflow returns to draft status. You can make changes and redeploy when ready.
Organizing with Categories
What are Categories?
Categories are folders that help organize workflows by project, team, or function. A workflow can belong to one category.
Managing Categories
- Create categories from the category dropdown
- Move workflows between categories by editing the workflow
- Delete empty categories when no longer needed
Best Practices
- Use consistent naming conventions
- Group related workflows together
- Create separate categories for production vs. development
Workflow Metrics
The list view shows basic metrics for each workflow:
- Last Run - When the workflow last executed
- Status - Most recent execution result (success/failure)
For detailed execution history and performance metrics, visit the Dashboard.
Tips for Managing Workflows
Keep Names Descriptive
Use clear, descriptive names that indicate what the workflow does. This makes searching and identification easier.
Use Draft Status for Development
Keep workflows as drafts while developing. Only publish when the workflow is ready for production use.
Regular Cleanup
Periodically review and remove unused workflows. This keeps the list manageable and reduces clutter.
Test Before Publishing
Always test workflows using the Preview feature before publishing. This catches issues before they affect live data.
Next Steps
- Designer Overview - Learn the canvas editor
- Building Flows - Create your first workflow
- Dashboard Overview - Monitor execution metrics